Fc7300DemoBoard
4 minute read
Introduction
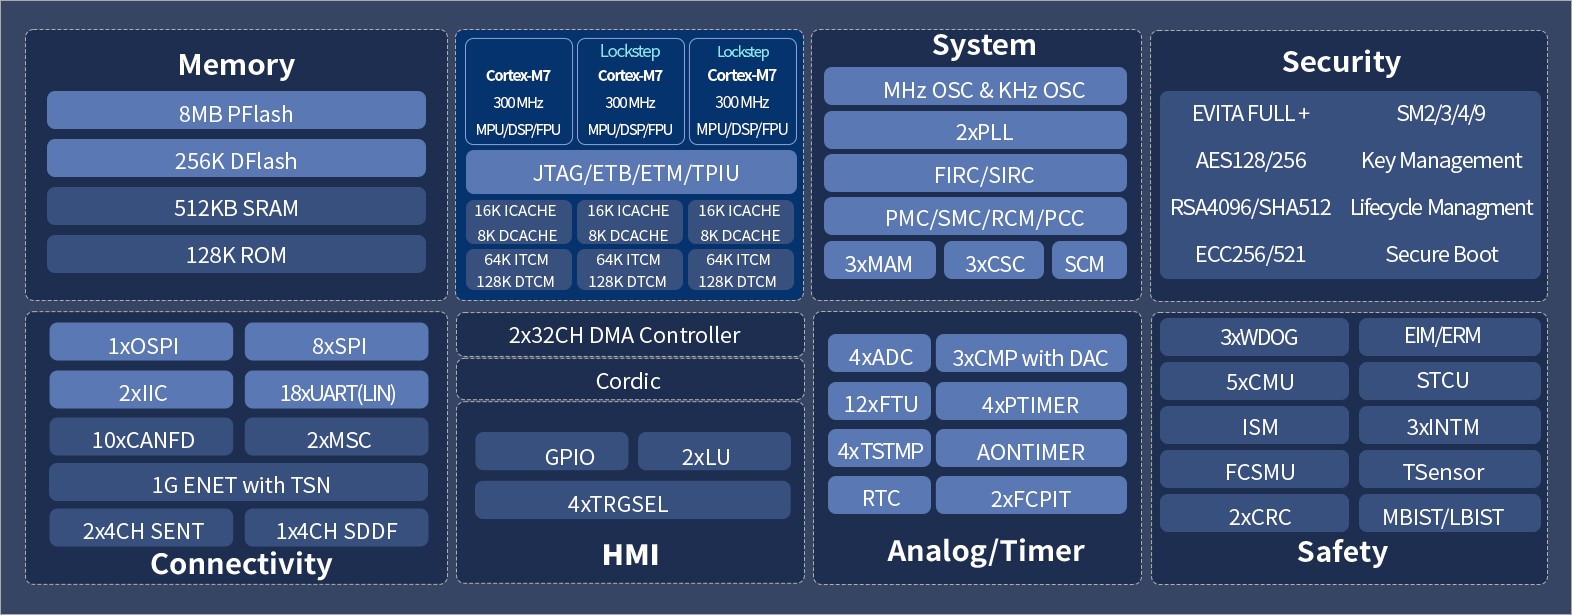
The FC7300Fxx product family features multiple ARM® Cortex®-M7 application cores with ASIL-D certification.
The FC7300Fxx product family is a high-performance automotive-grade HPU (Hyper Processing Unit) based on multiple Cortex-M7 cores, supporting multi-core configurations with ASIL-D + ASIL-B functional safety levels. It runs at up to 300 MHz, with 10 CAN-FD interfaces, 1 Gigabit Ethernet interface with TSN support. The chip integrates 8 MB of Flash and 1.1 MB of SRAM. The FC7300 product family supports EVITA Full+ HSM information security functionality. The product is certified to AEC-Q100 Grade 1.
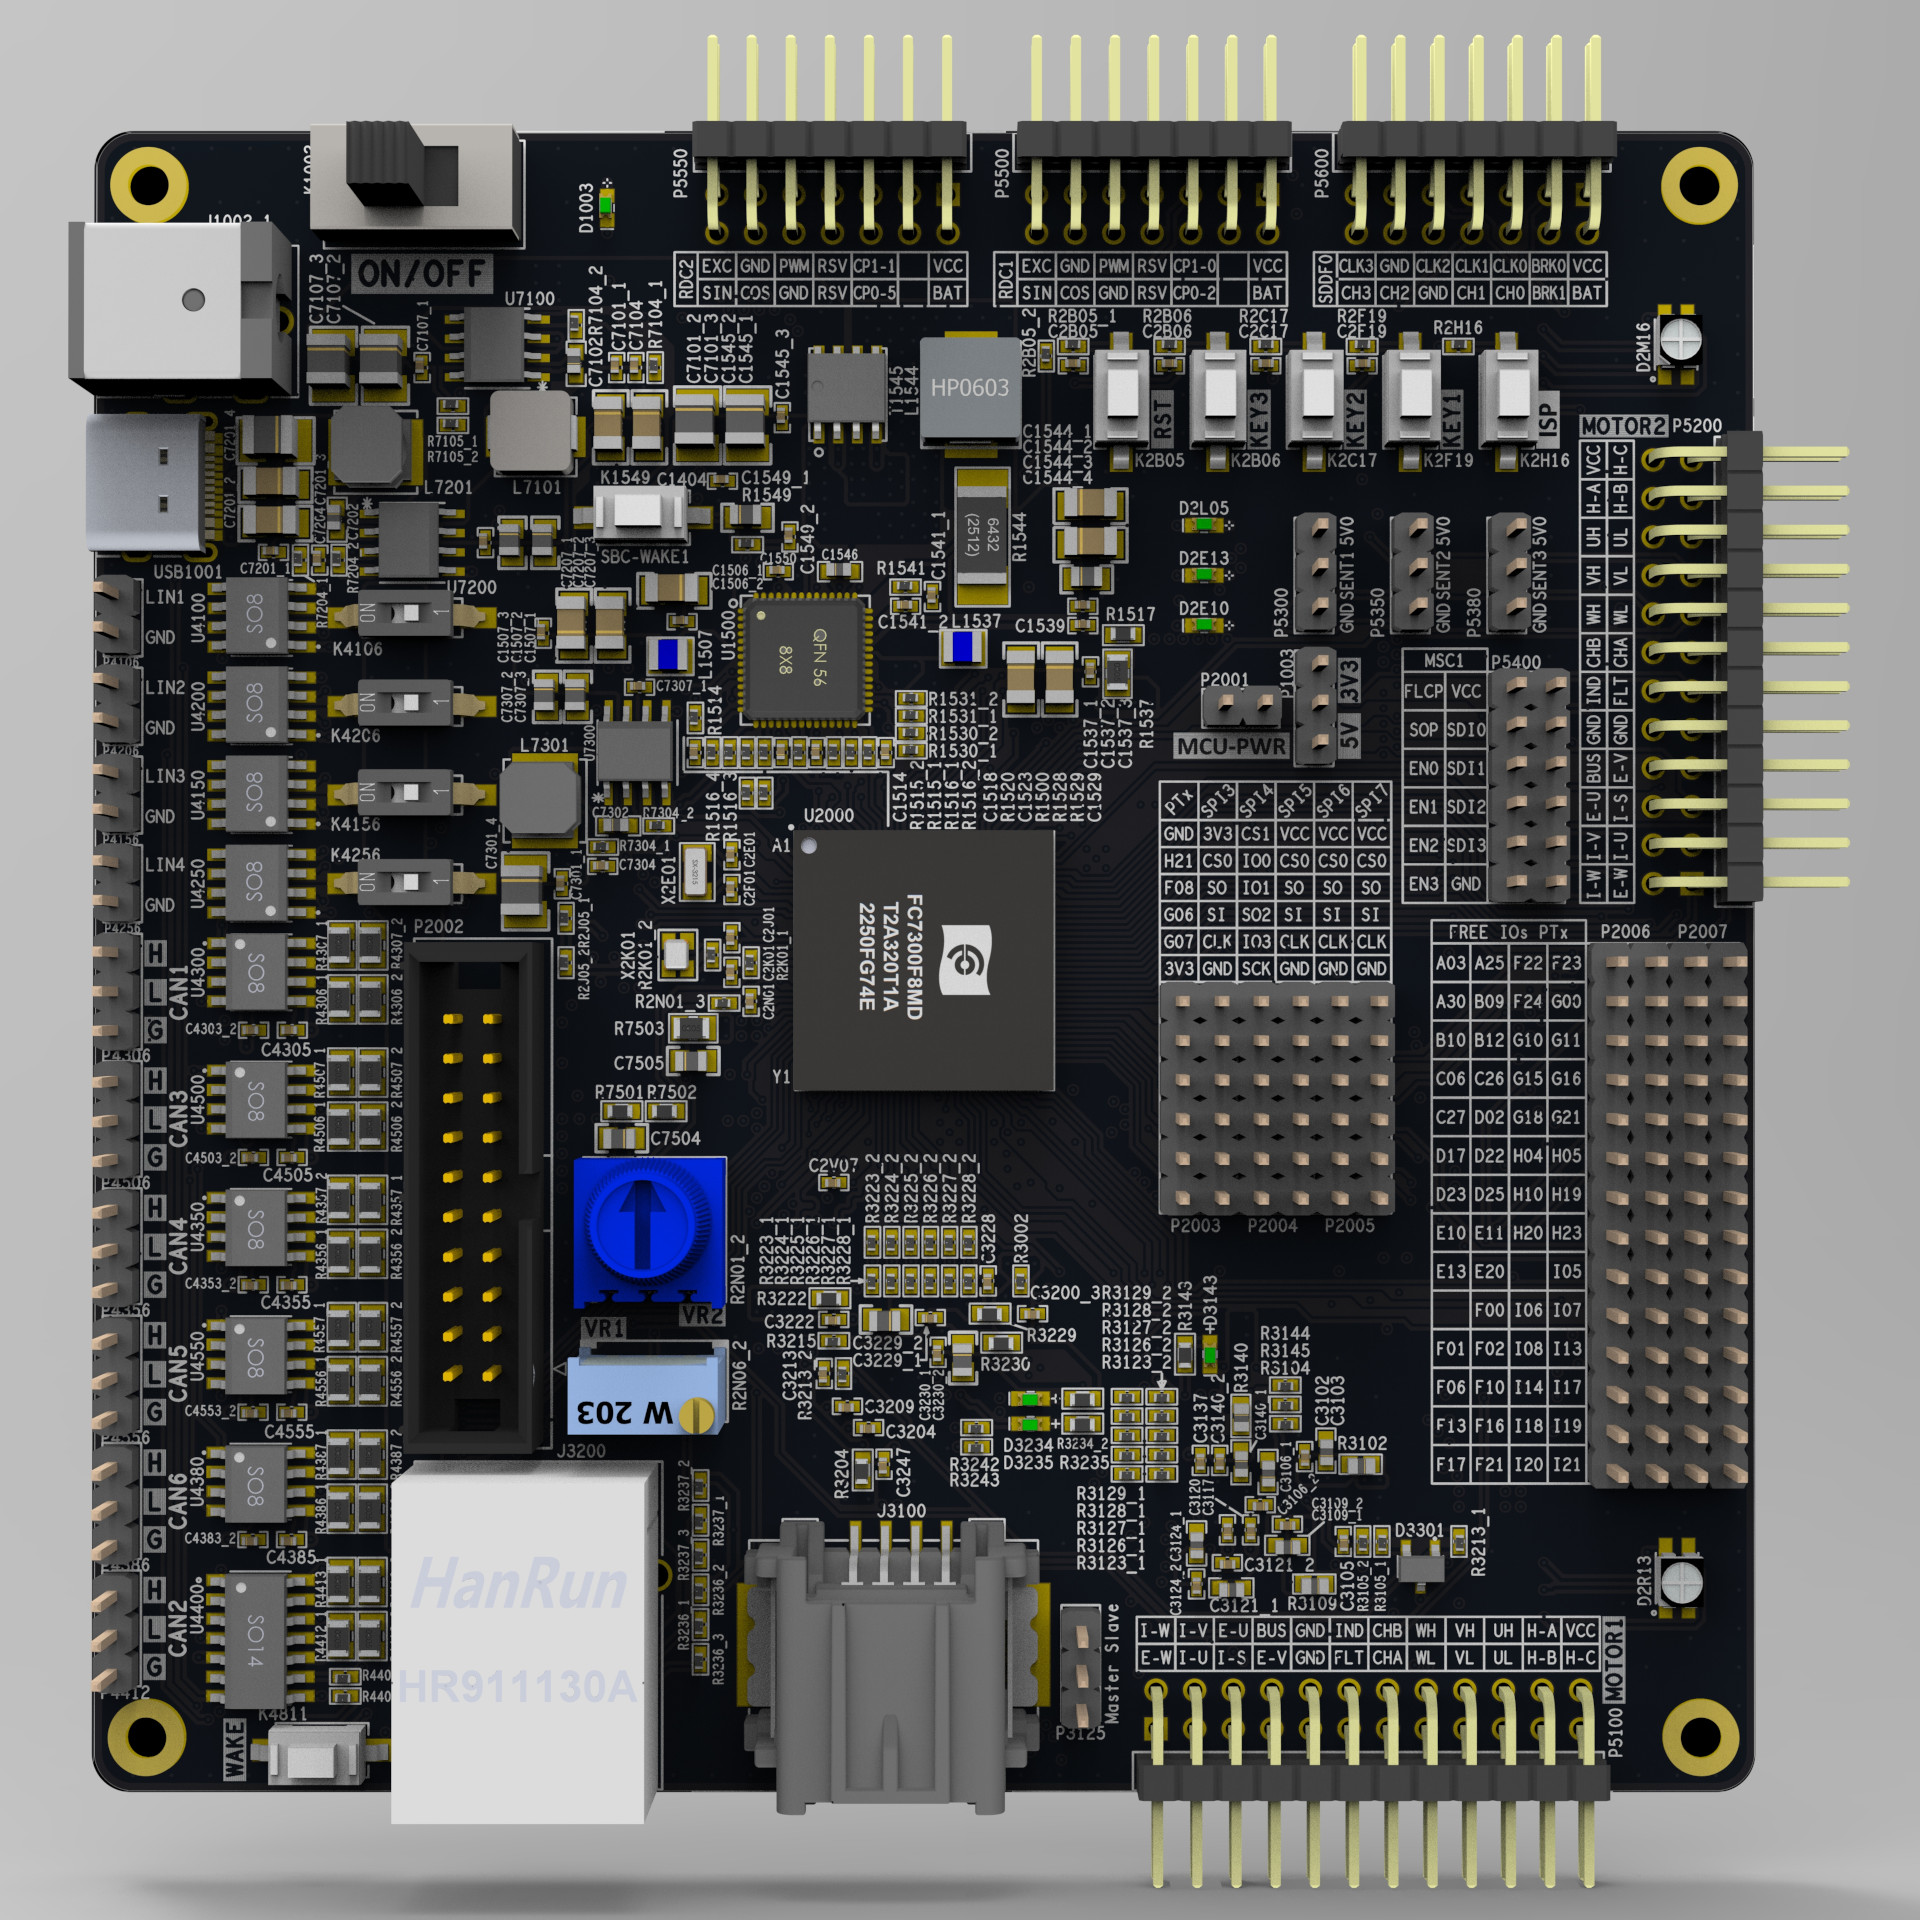
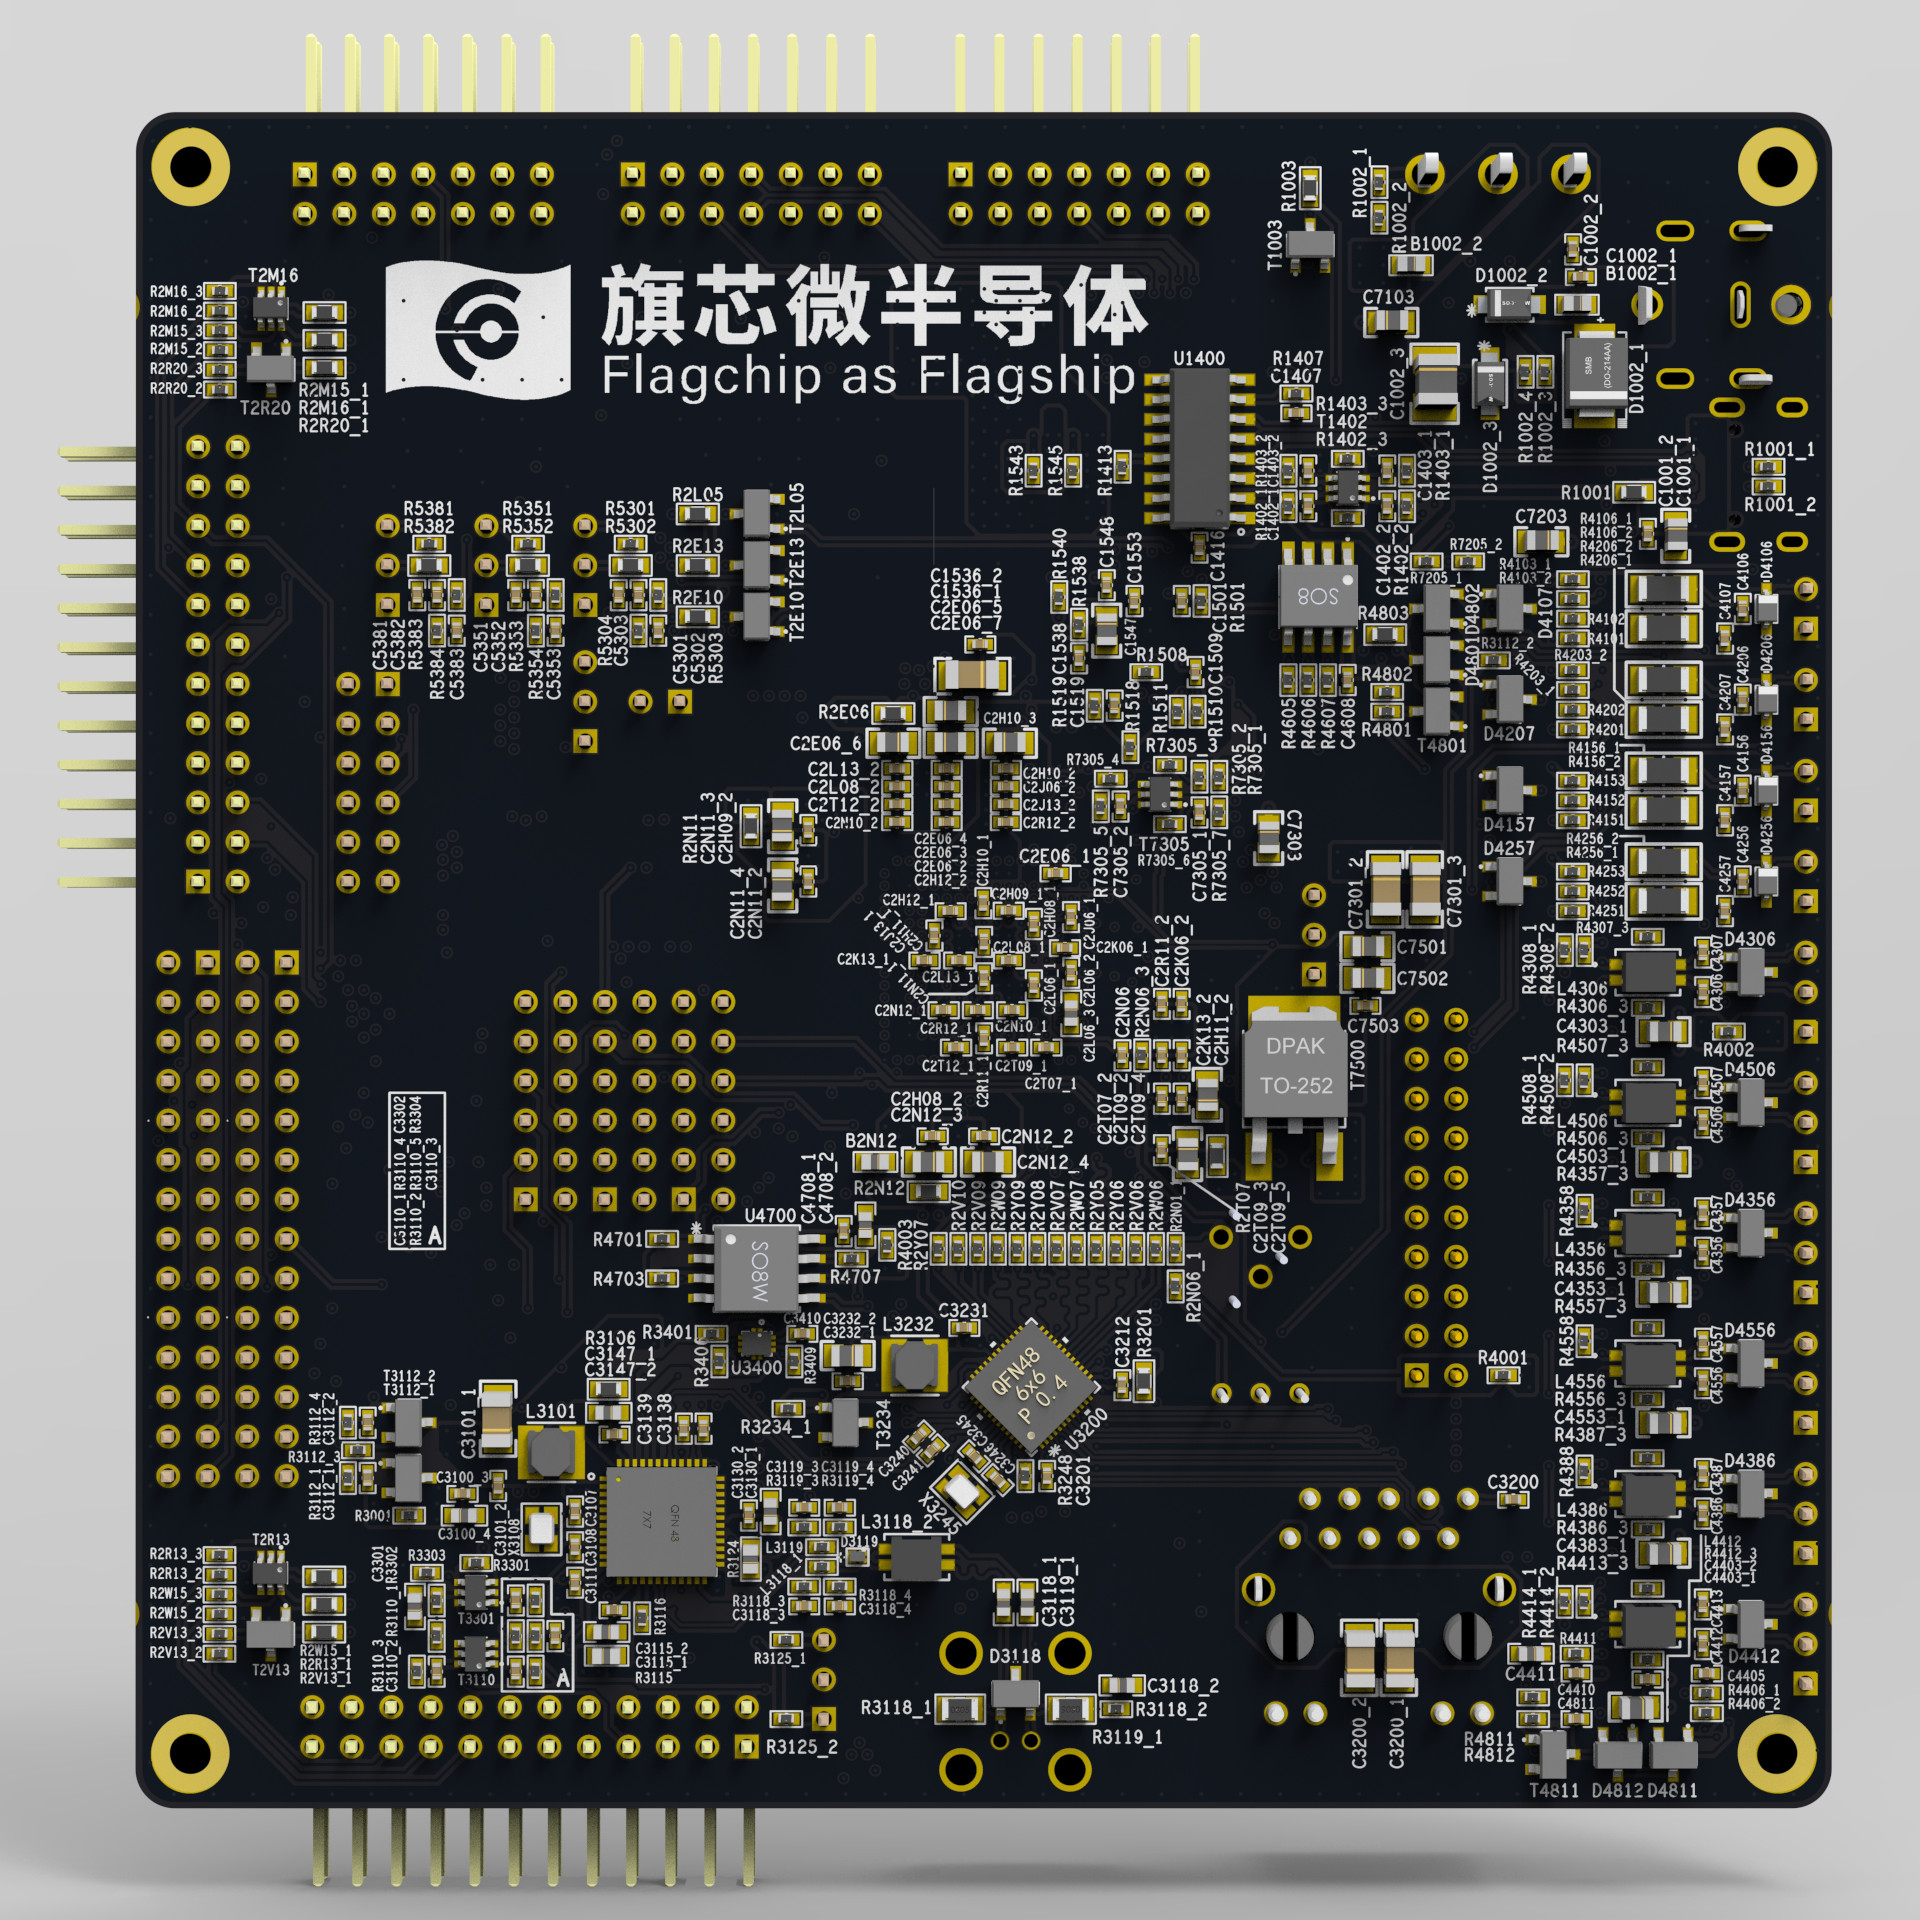
The board used in this project is the official Fc7300DemoBoard.
Development Environment Setup Guide
Source Code Structure
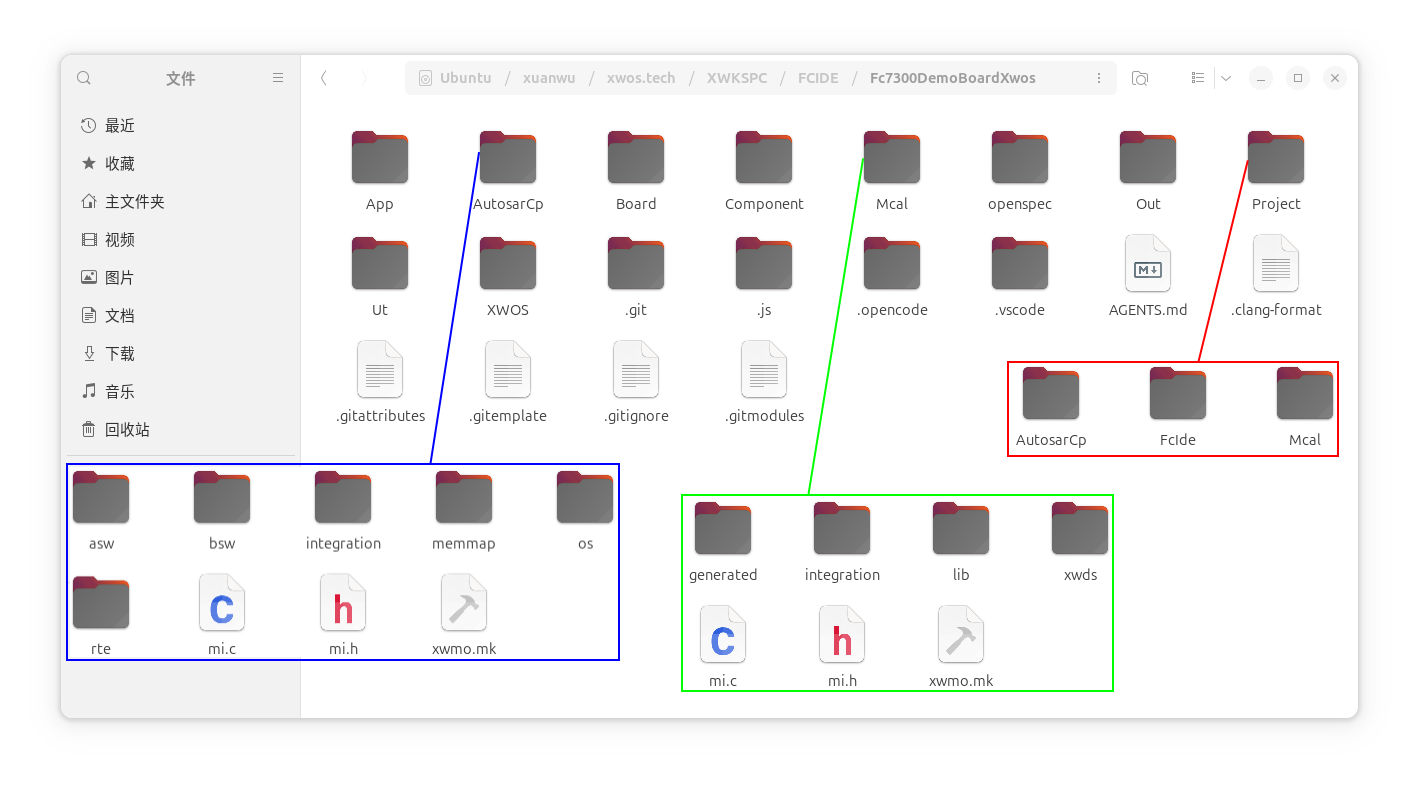
- App: RTOS applications
- AutosarCp: Autosar Classic Platform
- asw: Application components for AutosarCp
- bsw: System components for AutosarCp, including EcuM, BswM, CanIf, CanNm, Nm, CanSM, ComM, PduR, CanTp, Com, LdCom, Csm, CryIf, Nvm, MemIf, Dcm, Dem, …
- integration: Code for system integration
- memmap: AutosarCp Memmap
- os: Tasks created based on the XWOS AutosarCp OS compatibility layer
- rte: AutosarCp Rte
- Board: Board directory
- Component: RTOS system middleware
- Mcal: AutosarCp standard Mcal drivers
- generated: Generated driver configuration
- integration: Code for system integration
- lib: Mcal driver library
- xwds: XWOS device stack driver compatibility layer
- openspec: OpenSpec configuration
- Out: Build output
- Project: Project configuration
- FcIde: FC IDE project files
- Mcal: EB Tresos Studio project files
- AutosarCp: AutosarCp configuration tool project files
- Ut: Unit tests
- XWOS: RTOS kernel
- .git: Git data directory
- .js: Some JavaScript tools
- .opencode: AI Agent configuration
- .vscode: VS Code configuration
- AGENTS.md: AI Agent configuration
- .clang-format: Code style configuration
- .gitattributes: Git file attributes configuration
- .gitemplate: Git commit template
- .gitignore: Git ignore list
- .gitmodules: Git submodule
Mcal Configuration Tool
- Install the version of
EB Tresos Studioofficially recommended by Flagchip - Install the official Flagchip
Mcalplugin. CreateFc7300.linkunderEB Tresos Studio installation directory/linkswith the following content:
path=C:/Mcal_path (use forward slashes)
- In
EB Tresos Studio, selectFile–>Import–>General–>Existing Projects into Workspacethen clickNext > - Click
Browse...and select theProject/Mcaldirectory in the source code
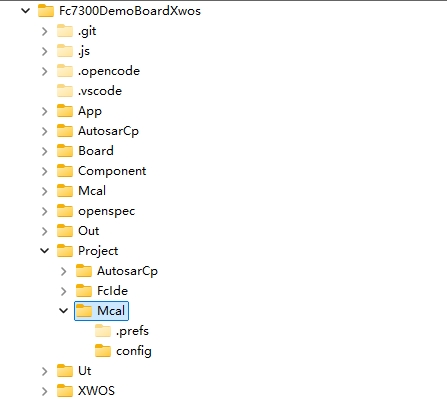
- Click
Finishto complete the import
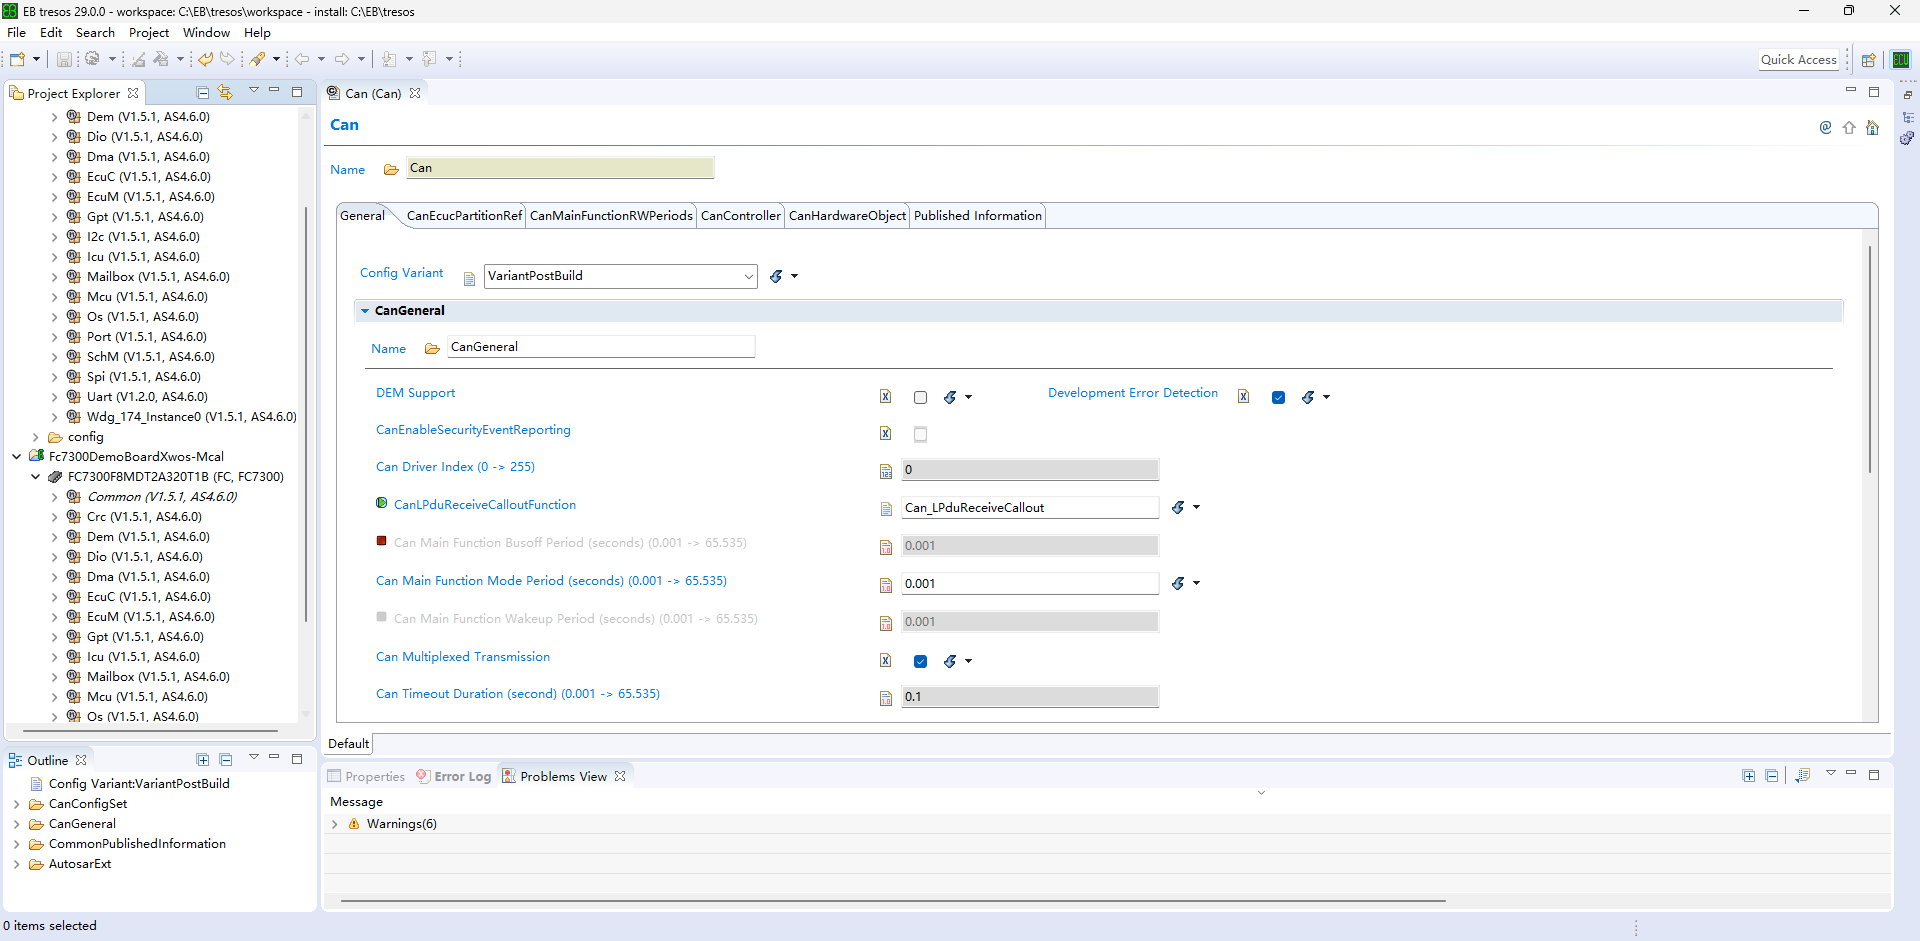
- After configuration, right-click on the project and select
Generate Project. The generated drivers will be at:Mcal/generated
Installing the Toolchain
xwtc is a collection of tools for compiling XWOS. It can be downloaded from Baidu Cloud Drive and installed following the instructions in the included 说明.md.
- https://pan.baidu.com/s/1WwSaEajt6JqgMOLOa8iPEQ
- Extraction code: xwos
- Note: The environment variable
XWTCmust be set. The gdb path configured in.vscode/launch.jsonrelies on this environment variable.
If using Ubuntu 24.04 as the development environment, some additional tools need to be installed:
sudo dpkg-reconfigure dash # select "No"
sudo apt install build-essential
sudo apt install emacs # for headless server environments, use emacs-nox instead
Debug Tools
JLink
- Download JLink software from the Segger website: https://www.segger.com/downloads/jlink/
- Download the official Flagchip JLink plugin
JLink_Patch_vX.XX.7z - Installation:
- Linux: Copy the contents of the
JLinkdirectory to~/.config/SEGGER/JLinkDevices/ - Windows: Copy the contents of the
JLinkdirectory toC:\Users\<username>\AppData\Roaming\SEGGER\JLinkDevices
- Linux: Copy the contents of the
Official IDE: FC IDE
- Select
File–>Open Projects from file system... - Click
Directory...and select theProject/FcIdedirectory in the source code - Click
Finishto complete the import
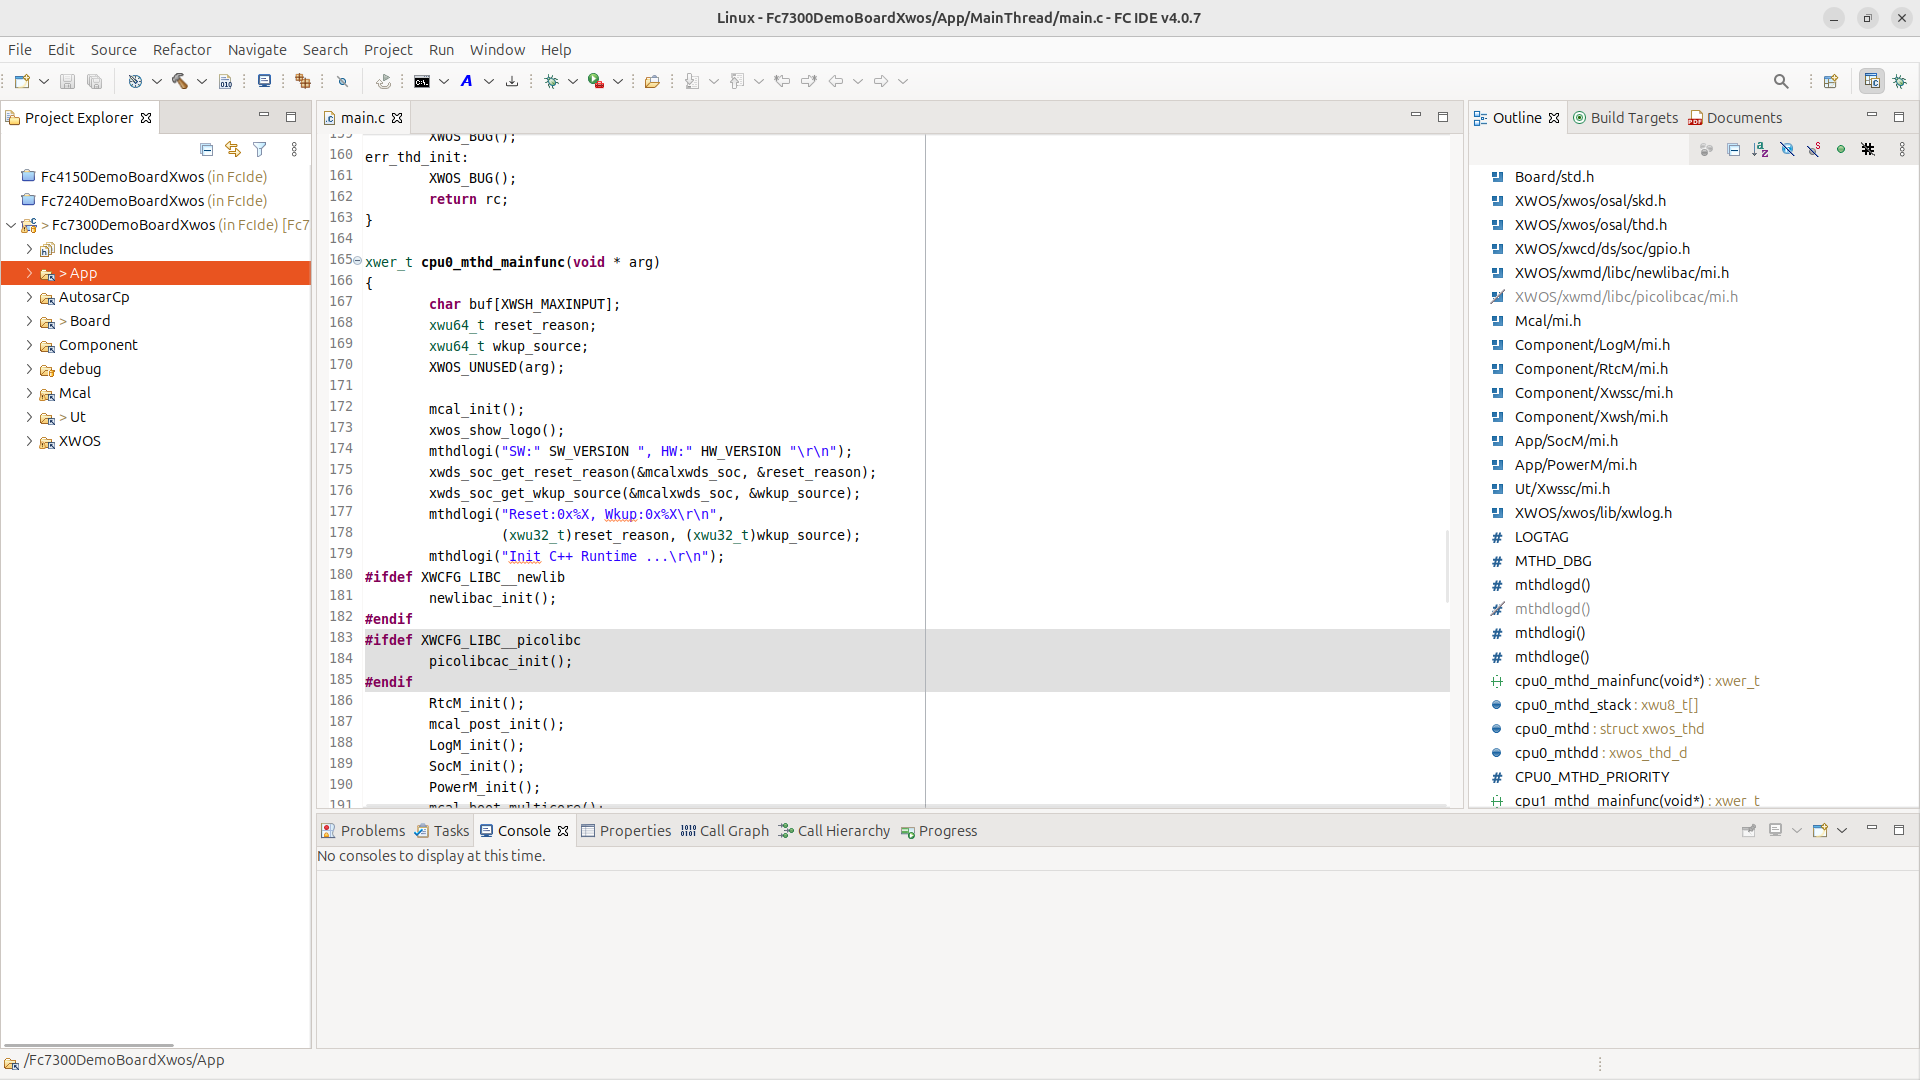
- Build: Right-click on the project –>
Build Project - Debug:
- Click
Run–>Debug Configurations..., choose based on your platform Linux_JLink_P+D: Linux, flash programming & Core0 debugLinux_JLink_Core0_D: Linux, attach Core0 debugLinux_JLink_Core1_D: Linux, attach Core1 debugLinux_JLink_Core2_D: Linux, attach Core2 debugWindows_JLink_P+D: Windows, flash programming & Core0 debugWindows_JLink_Core0_D: Windows, attach Core0 debugWindows_JLink_Core1_D: Windows, attach Core1 debugWindows_JLink_Core2_D: Windows, attach Core2 debug
- Click
VS Code
- Install VS Code
- Install extensions:
Cortex-DebugC/C++C/C++ Extension PackChinese (Simplified) Language Pack for Visual Studio Code
- Build: In VS Code, select
Terminal–>Run Task- Build:
build - Clean:
clean
- Build:
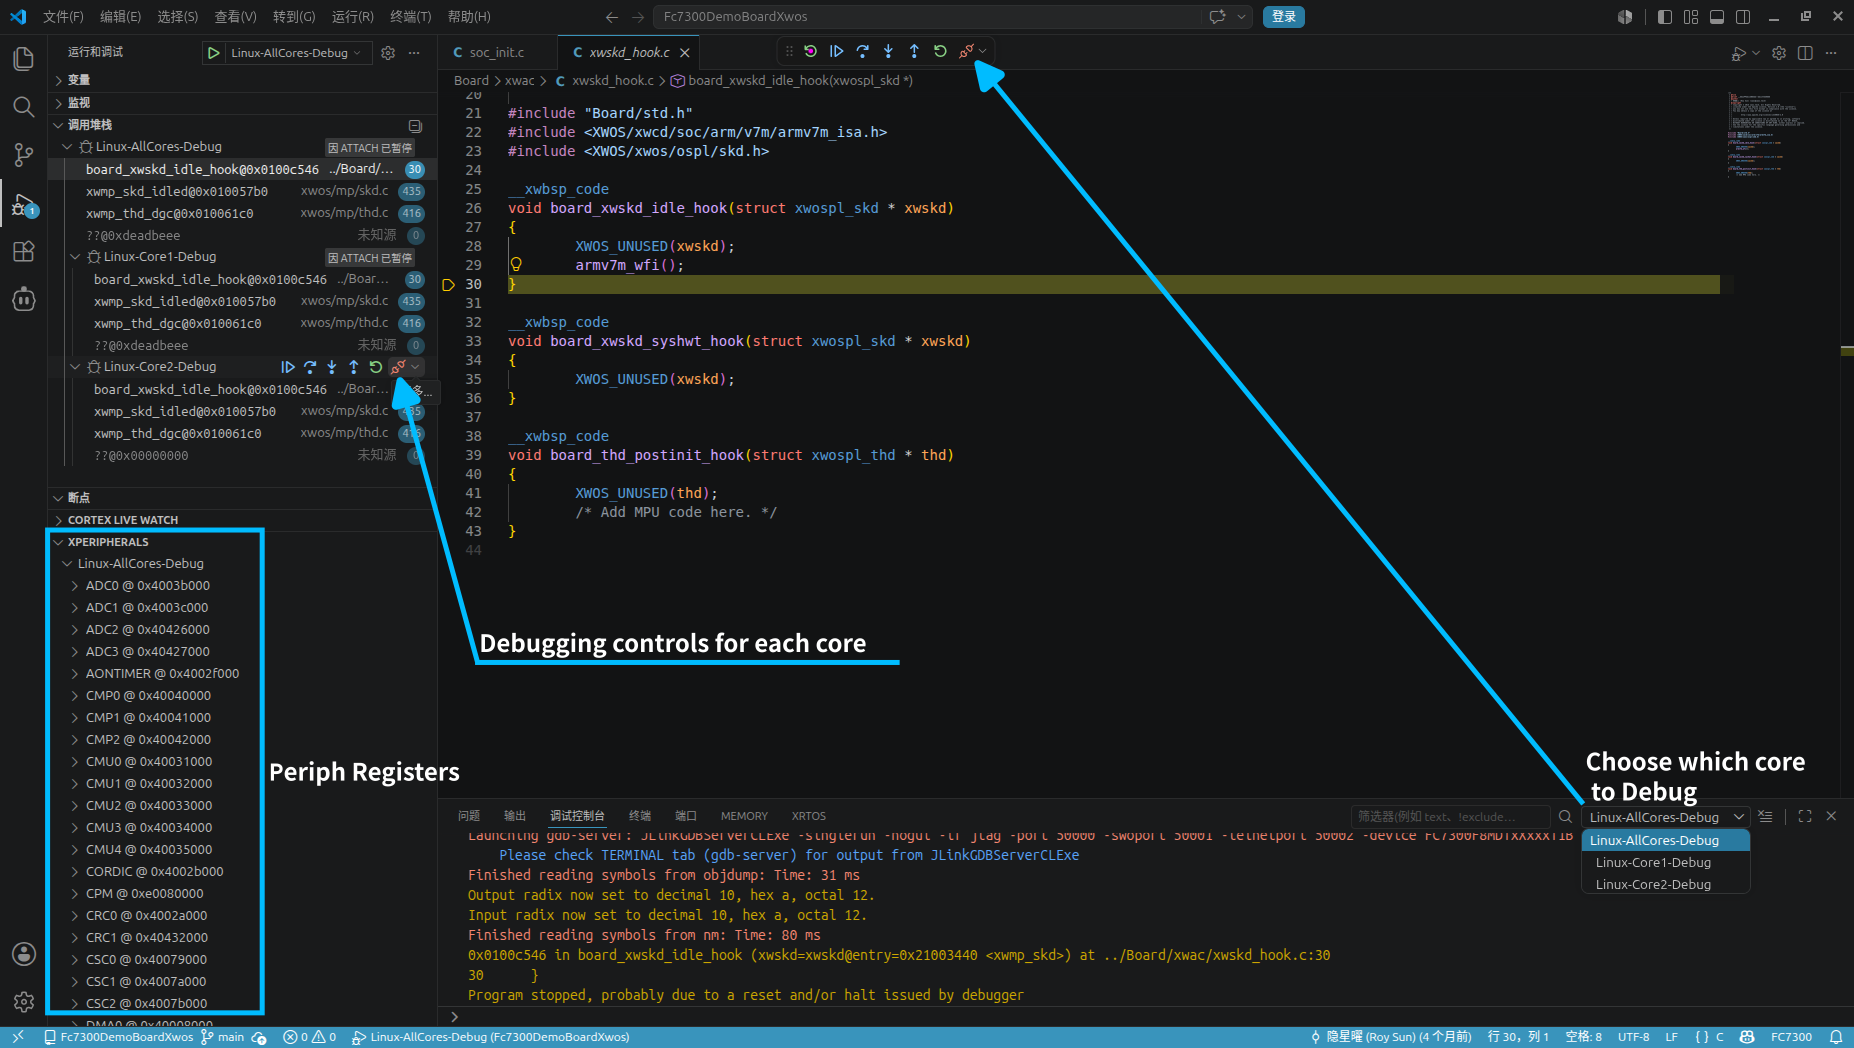
- Debug: From the
Run and Debugpanel- Linux
Linux-AllCores-Program-Debug: Program and debugLinux-AllCores-Debug: Attach debug
- Windows
Windows-AllCores-Program-Debug: Program and debugWindows-AllCores-Debug: Attach debug
- Linux
- Debug Tips
- Using
Program-Debugmay cause incorrect startup timing. If so:- Click
Continueon Cpu0 first - Then click
Restarton the other CPUs - Click
Continueon Cpu0 again - Click
Continueon each CPU in turn
- Click
- Using
Serial Terminal
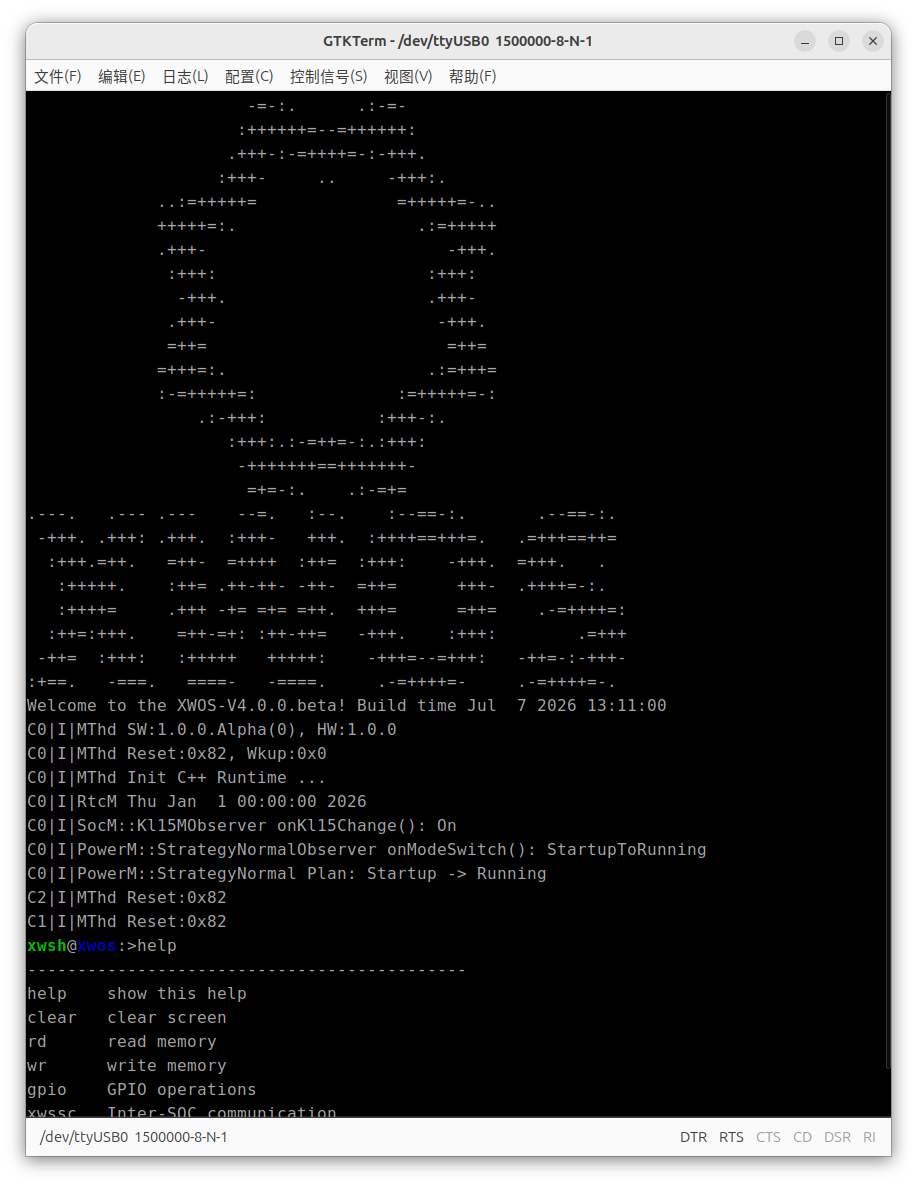
The USB-C port on the development board is actually a serial port, which can be used for command-line terminal and log output.
- Connect the board’s USB-C port to the computer using a Type-C USB cable
- Open a terminal tool and set the baud rate to: 1500000 BPS