STM32
4 minute read
Example Projects
XWOS provides a number of example projects:
- STM32F072C8XWOS: STM32F072C8 minimum system
- STM32F103C8XWOS: STM32F103C8 minimum system
- ATKSTM32F103ZXWOS: ALIENTEK F103 core board
- ATKSTM32F407ZXWOS: ALIENTEK F407 core board
- EmbedFireStm32H743XWOS: EmbedFire STM32H743-Pro development board
- AtkApolloH743XWOS: ALIENTEK Apollo STM32H743 development board
- FK429M1XWOS: FANKE STM32F429-M1 development board
- WeActMiniStm32H750XWOS: WeAct MiniStm32H750 development board
Development Environment
XWOS Toolchain
Refer to XWTC Installation Guide
Rust Development Environment
STM32 supports development using the Rust language. Refer to Rust Development Environment Guide.
STM32CubeMX
The .ioc files in STM32 projects need to be opened and configured by STM32CubeMX.
- URL: STM32CubeMX
Vscode
XWTC version 4.1 or later is required. The Stlink-GdbServer and
Stm32CubeProgrammer included in it are essential tools for debugging code in Vscode.
Install
- Install VSCode
- Install extensions:
Cortex-DebugC/C++C/C++ Extension PackChinese (Simplified) (简体中文) Language Pack for Visual Studio Code
Open a Project
All STM32 example projects provided by XWOS include VSCode configuration. After downloading the source code, simply open the project root directory in VSCode.
Files related to project configuration:
.vscode: project-level VSCode configurationlaunch.json: debugging configurationtasks.json: build configuration
.clang-format: code style configurationDebugger/STM32xxx.svd: peripheral register information, used to view peripheral register values during debugging
Build/Clean
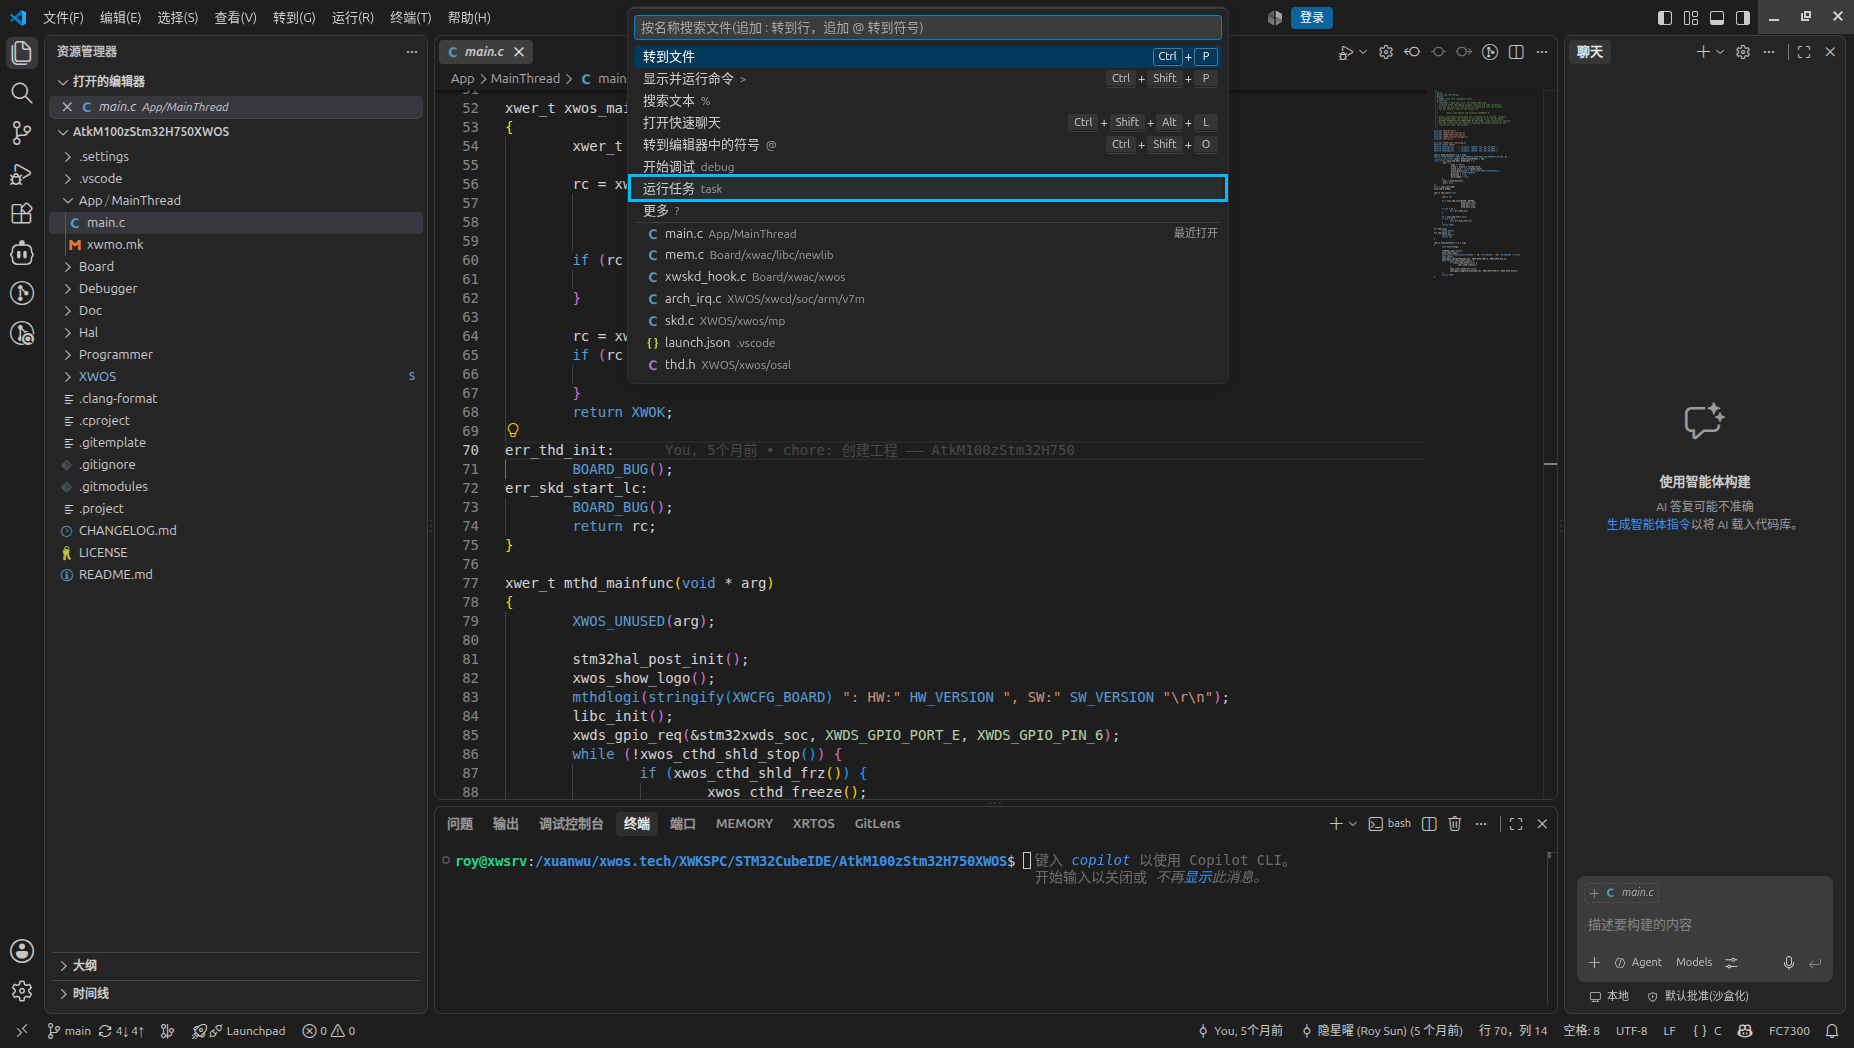
- Build: click
Quick Access–>Run Task–>build - Clean: click
Quick Access–>Run Task–>clean
Start Debugging
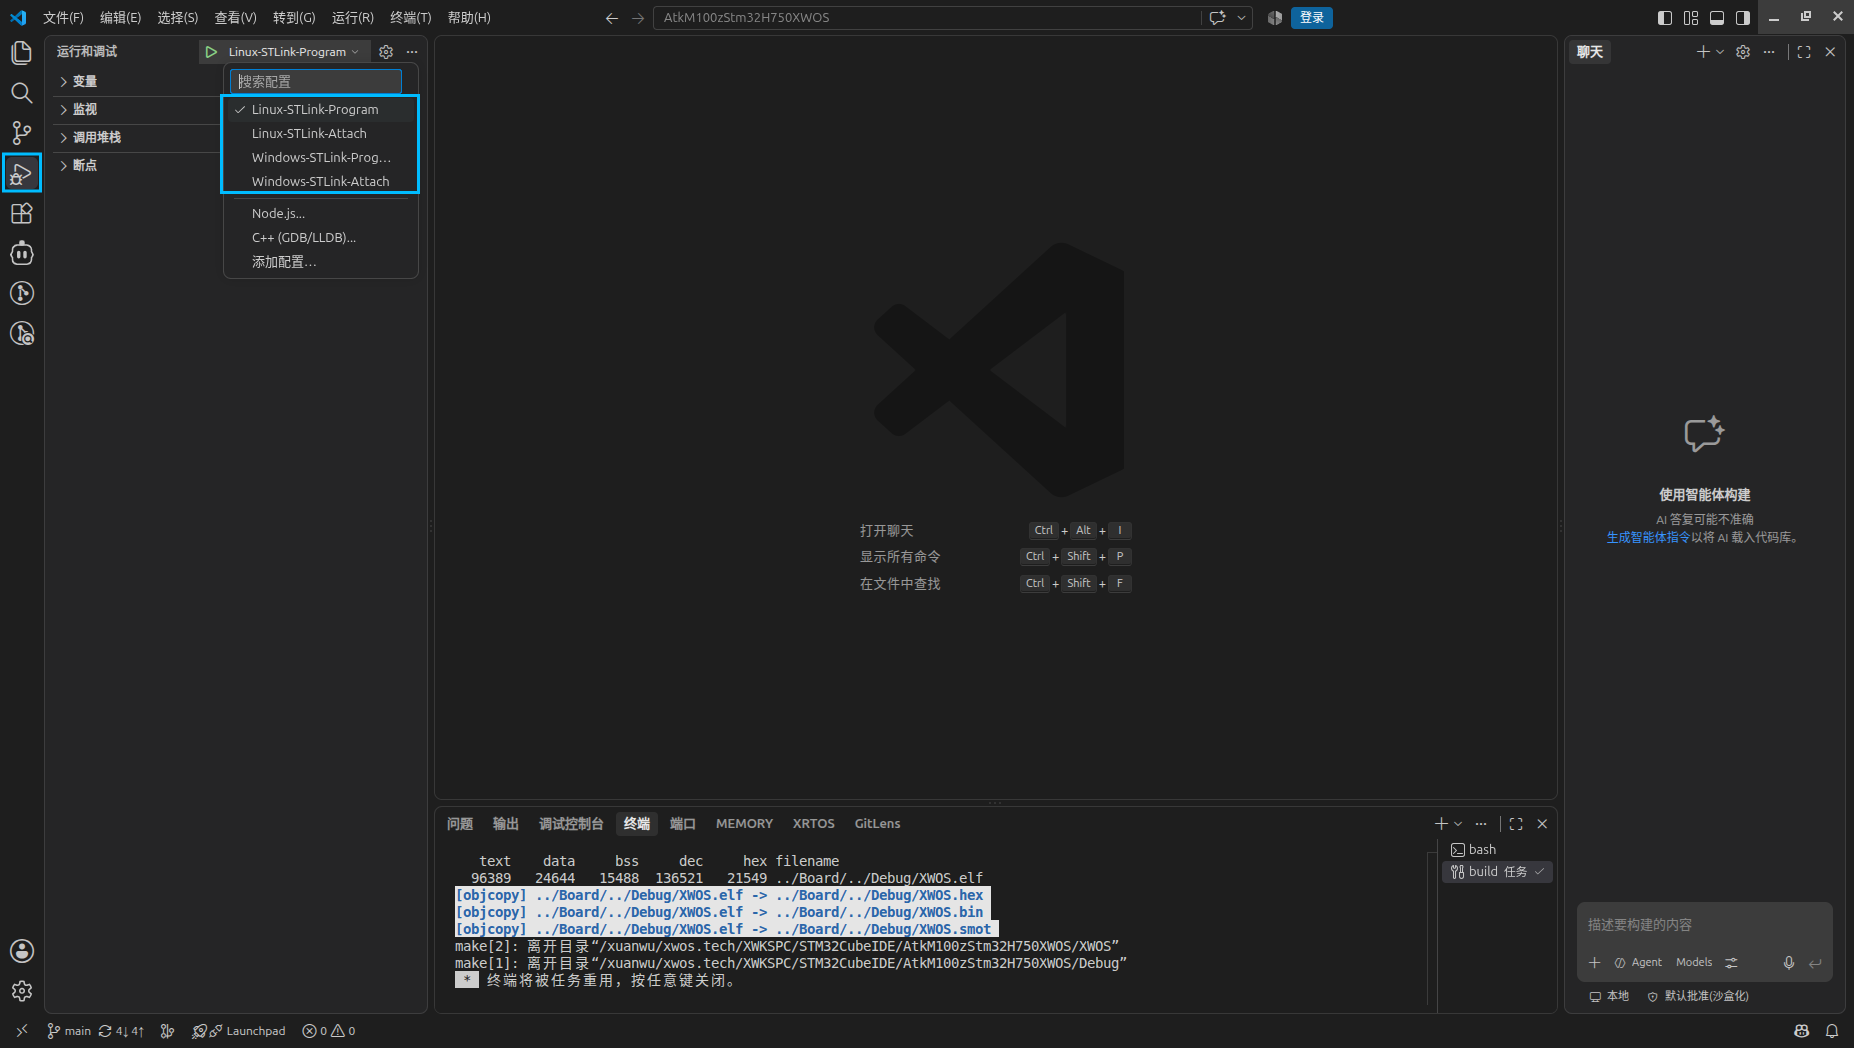
Switch to Run and Debug, select an item and click the green arrow to start debugging
- Linux-STLink-Attach
- PC OS: Linux
- Debugger: STLink
- Operation: Attach to MCU without reset
- Linux-STLink-Program
- PC OS: Linux
- Debugger: STLink
- Operation: Reset, download, debug
- Windows-STLink-Attach
- PC OS: Windows
- Debugger: STLink
- Operation: Attach to MCU without reset
- Windows-STLink-Program
- PC OS: Windows
- Debugger: STLink
- Operation: Reset, download, debug
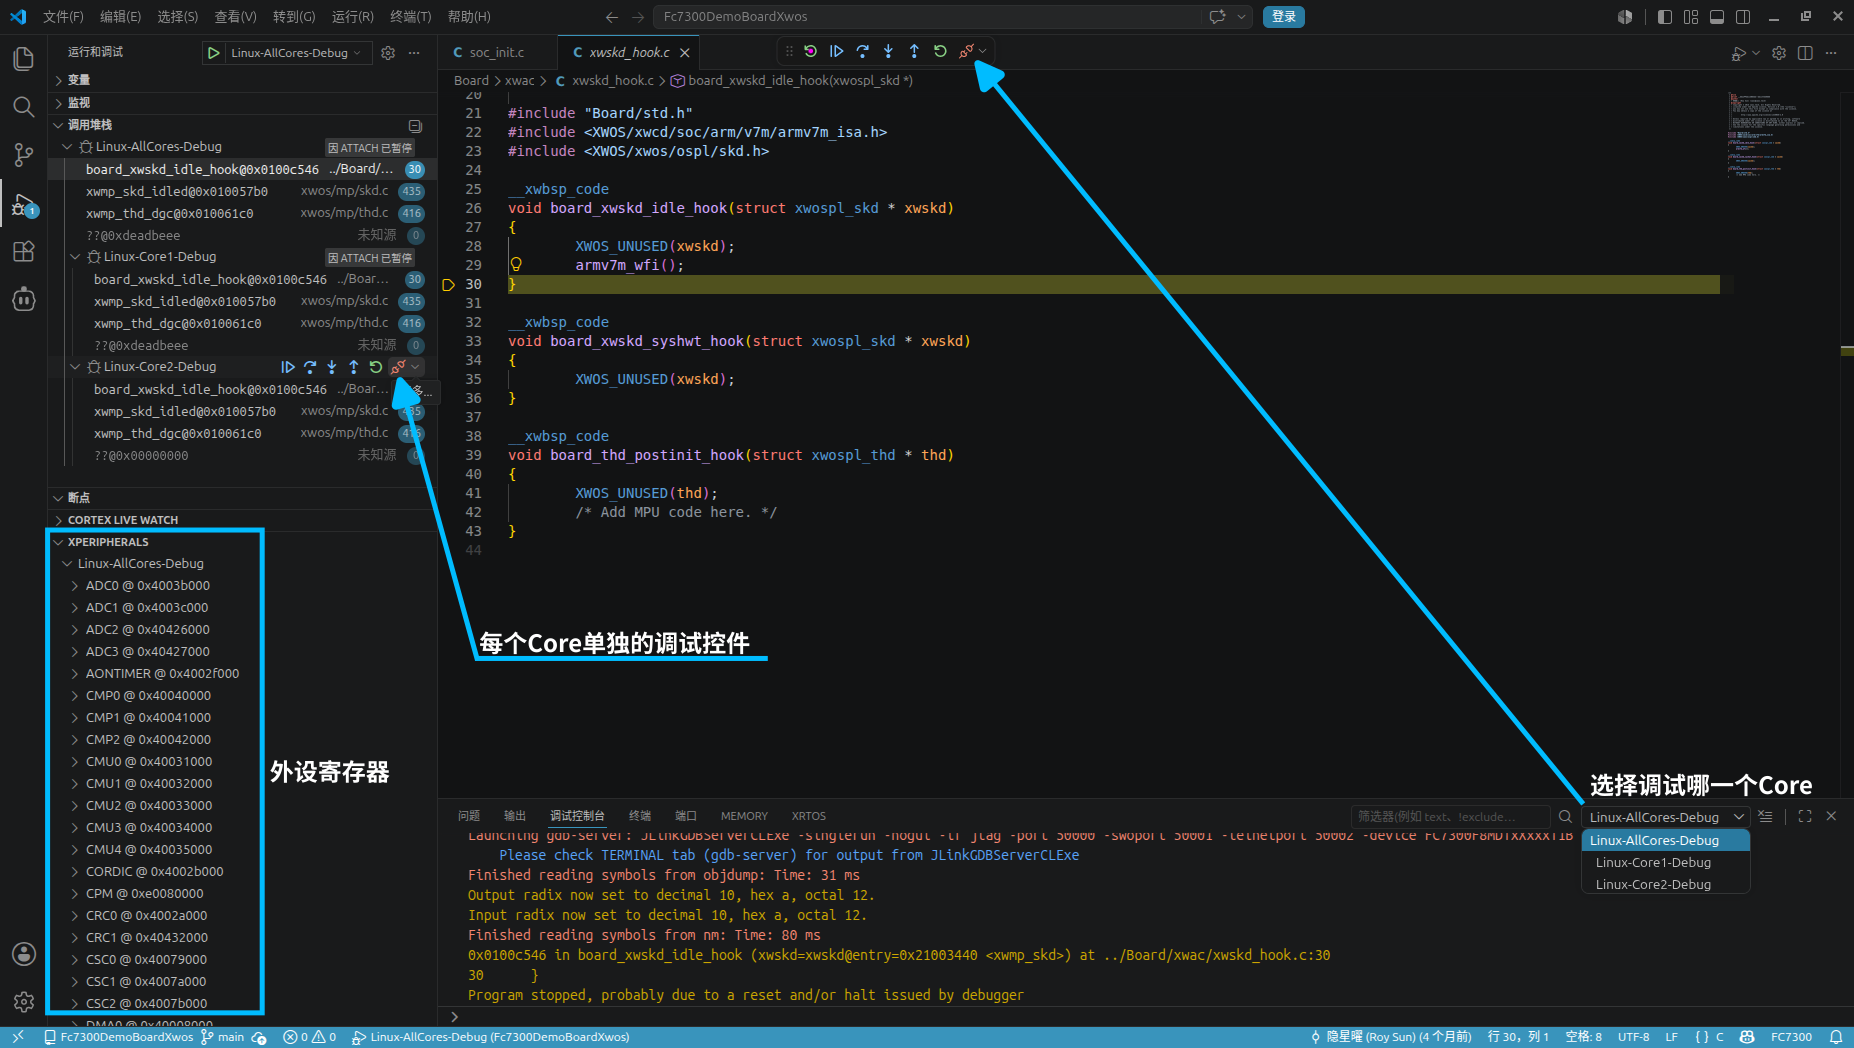
Debug Console
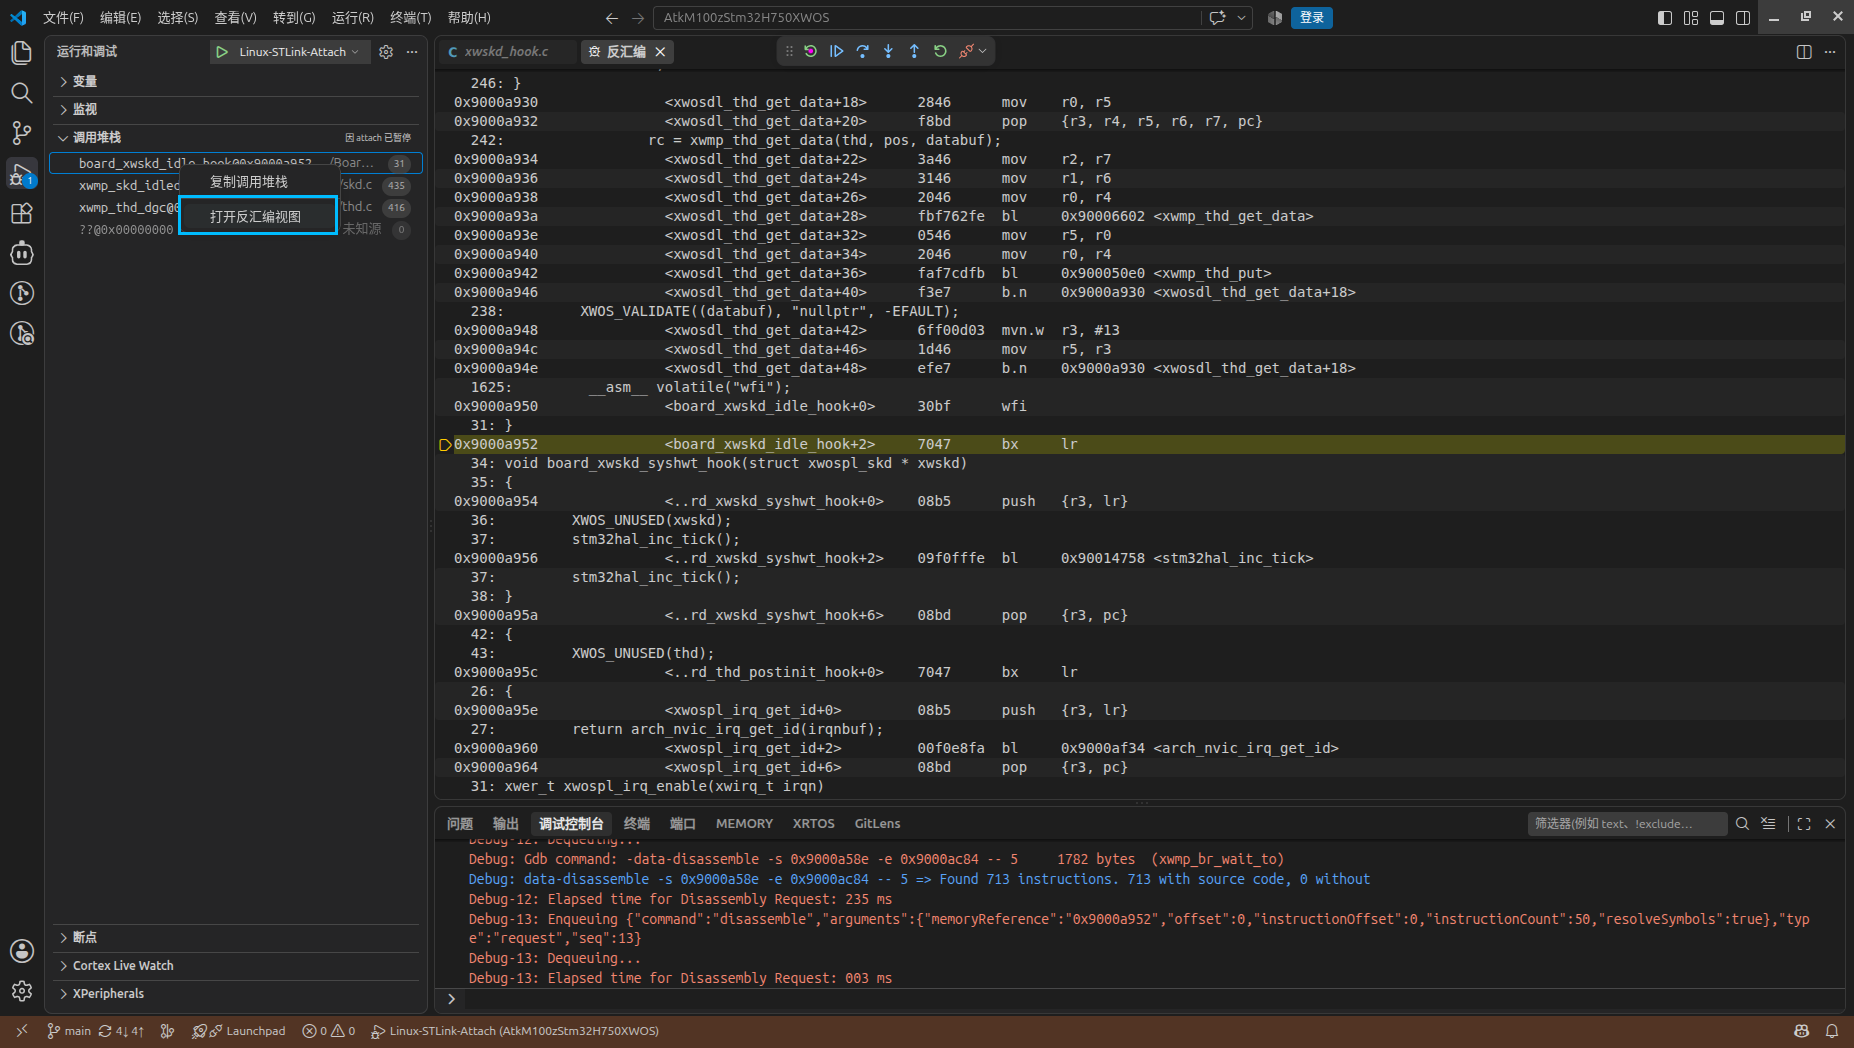
Instruction-Level Single-Step Debugging
Right-click a function name in the Call Stack, then select Open Disassembly View.
Single-stepping in the Disassembly View is instruction-level single-step debugging.
Eclipse STM32CubeIDE
For newer computers and operating systems, there are many issues and it is not recommended to use it.
Install
- URL: STM32CubeIDE
- On Ubuntu, JRE needs to be installed:
sudo apt install openjdk-11-jdk - JRE8 also needs to be installed in Windows 11
Rust Plugin for STM32CubeIDE
Be careful not to select the latest version of the plugin:
- Menu:
"Help" -> "Install New Software..." -> "Add..." - Repository:
http://mirrors.ustc.edu.cn/eclipse/corrosion/releases/1.2.3/ - Plugin:
Corrosion: Rust edition in Eclipse IDE
Import a Project
All STM32 example projects provided by XWOS include STM32CubeIDE configuration. After downloading the source code, place the source code in the STM32CubeIDE working directory (i.e., the directory specified when STM32CubeIDE starts).
Import via the menu File –> Import… –> General –> Projects from Folder or Archive, then browse to the project root directory.
Files related to project configuration:
.project: Eclipse project file.cproject: Eclipse CDT project file.settings: Eclipse project settingsDebugger: debugging configuration
Build
There are two ways to build, both produce the same result:
- Open a terminal, change the current path to the
Boarddirectory of the project, and run themakecommand. - Click the Build button in the IDE.
Known Issue
- Platform: Windows 11
- Symptom: When building in STM32CubeIDE, the error
make (e=3): 系统找不到指定的路径。is reported. - Cause: The
makecommand bundled with STM32CubeIDE is incompatible. - Solution: Use the
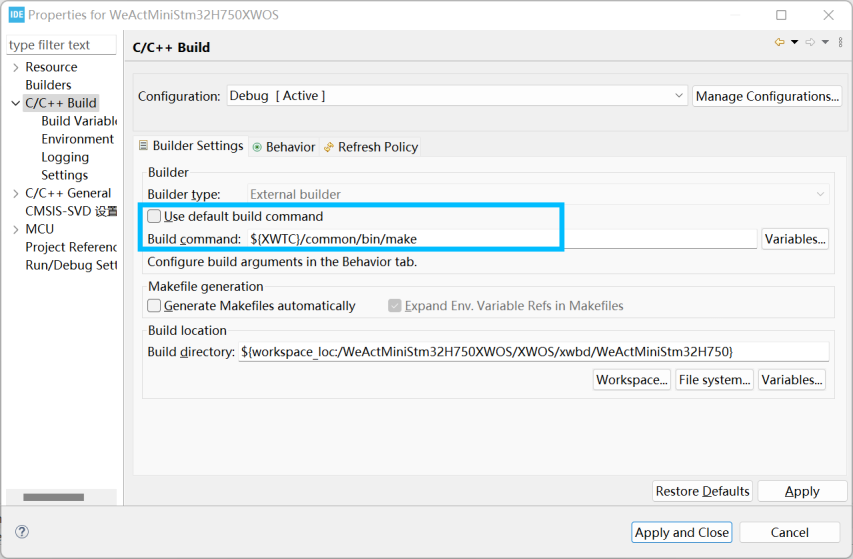
makecommand provided by XWTC. Configure it as follows:
Debug
- Menu Run –> Debug Configurations…
- STLink-Attach.launch: debug with STLink without reset
- STLink-Program.launch: reset, download and debug with STLink
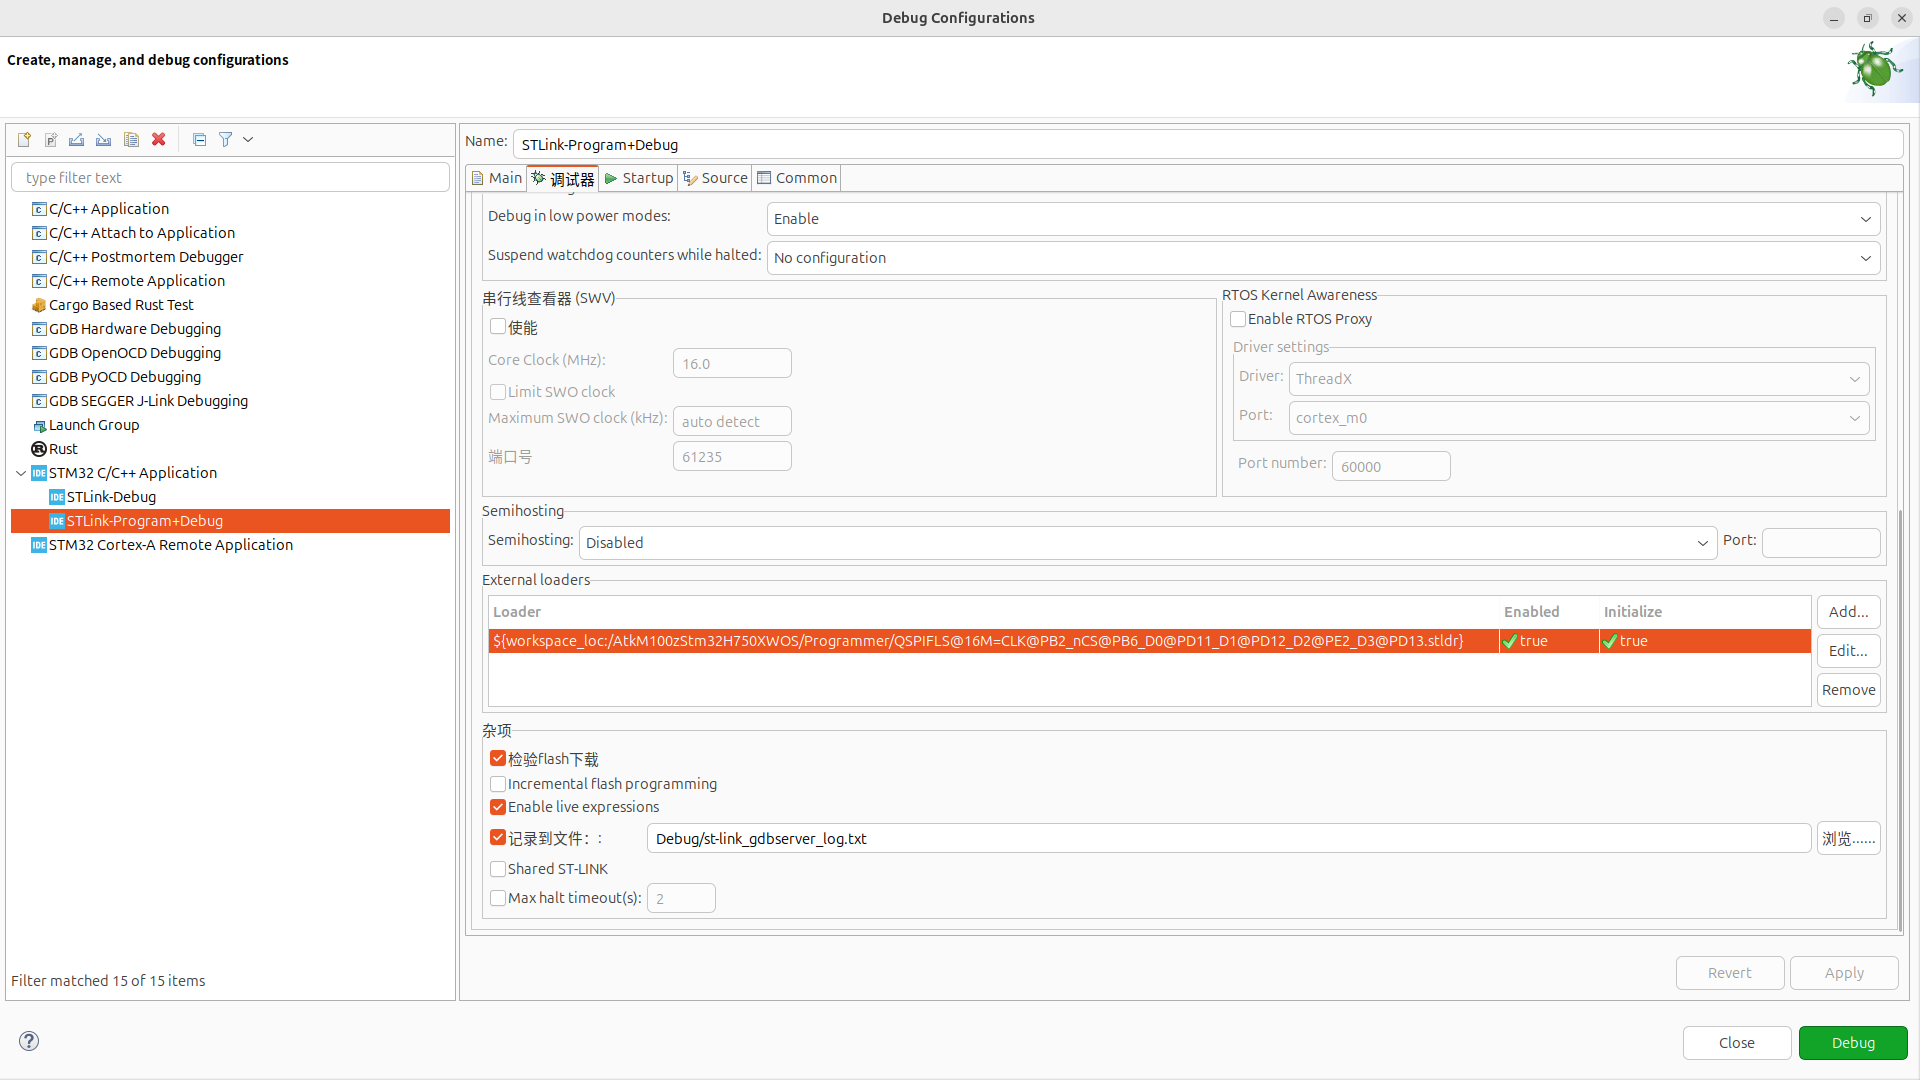
- If the MCU code is stored on an external XIP QSPI Flash, the ExternalLoader also needs to be configured.
- The
ExternalLoadercan use theworkspacepath inside the project - It can also be copied to STM32CubeIDE:
<STM32CubeIDE install directory>/plugins/com.st.stm32cube.ide.mcu.externaltools.cubeprogrammer.linux64_2.2.500.202603051304/tools/bin/ExternalLoader. The downside is that every time STM32CubeIDE updates the cubeprogrammer plugin, the path changes and the file can no longer be found.
- The
Debugging Tips
ARMv7-M7 CPUs have cache, which often causes trouble during debugging.
Comment out the following macro switches or set them to 0 to disable the cache:
/* Board/cfg/board.h */

#define BRDCFG_DCACHE   1
#define BRDCFG_ICACHE   1