Raspberry Pi 4B
3 minute read
Introduction
The Raspberry Pi 4B project is an example project within the XWOS main repository. The project directory is located at xwbd/RPi4B.
- Hardware homepage: https://www.raspberrypi.com/products/raspberry-pi-4-model-b/
- SoC: BCM2711
Development Environment Setup Guide
Download Source Code
git clone https://gitee.com/xwos/XWOS.git
or
git clone https://github.com/xwos/XWOS.git
vscode
Debugging requires installing vscode first.
Install plugins:
Cortex-DebugC/C++Chinese (Simplified) (简体中文) Language Pack for Visual Studio Code
Install Toolchain
xwtc is a collection of tools for XWOS compilation. It can be downloaded from Baidu Cloud Drive and installed according to the included 说明.md.
- https://pan.baidu.com/s/1WwSaEajt6JqgMOLOa8iPEQ
- Extraction code: xwos
- Note: Make sure to set the environment variable
XWTC. The gdb path configured in.vscode/launch.jsonwill use this environment variable.
If the user uses Ubuntu-24.04 as the development environment, some additional tools need to be installed:
sudo dpkg-reconfigure dash # Select "No"
sudo apt install build-essential
sudo apt install emacs # For a pure command-line server environment, use emacs-nox instead
openocd
- https://github.com/xpack-dev-tools/openocd-xpack/releases
- Download the latest version according to your platform.
Ubuntu
-
- Extract.
-
- Open
Home, pressctrl+hto show hidden files, find.local/. Copy the extracted contents (folders likebin,openocd,libexec, etc.) into.local/and merge.
- Open
-
- Re-login for the changes to take effect.
Windows
-
- Extract.
-
- Right-click
This PC–>Properties–>Advanced System Settings–>Environment Variables.
- Right-click
-
- Find the environment variable
Path, add the path to the extractedbinfolder.
- Find the environment variable
-
- Re-login for the changes to take effect.
Build
There are two ways to build:
- Open a terminal and enter:
- Switch to the board directory:
cd xwbd/RPi4B - Build:
make -j20 - Clean:
make d
- Switch to the board directory:
- In Vscode, select
Terminal–>Run Task- Build:
build - Clean:
clean
- Build:
Debugging
Create Bootable TF Card
- Go to the Raspberry Pi official website https://www.raspberrypi.com/software/ and download
Raspberry Pi Imager - Use
Raspberry Pi Imagerto create a bootable SD card- Device: select
RASPBERRY PI 4 - System can be:
RASPBERRY PI OS(64-BIT)orUse customand select an Ubuntu image
- Device: select
- Open the TF card’s
system-bootpartition and delete all files in it. - Copy all files from the
xwbd/RPi4B/firmware/directory to the TF card’ssystem-bootpartition.
Connect Debugger
| JTAG Signal | Raspberry Pi 4B Pin | GPIO | Notes |
|---|---|---|---|
| TMS | J8-13 | 27 | |
| nTRST | J8-15 (TRST) | 22 | |
| VTREF | J8-17 (3v3) | Required for Segger official JLink | |
| RTCK | J8-16 | 23 | Optional |
| TDO | J8-18 | 24 | |
| TCK | J8-22 | 25 | |
| TDI | J8-37 | 26 | |
| GND | J8-39 | ||
| nRESET/SRST | J2-RUN |
Connect Terminal UART
| UART Signal | Raspberry Pi 4B Pin | GPIO | Notes |
|---|---|---|---|
| TXD | J8-08 | 14 | |
| RXD | J8-10 | 15 | |
| GND | J8-25 |
- Baud rate: 2000000 BPS
Start Debugging
- Insert TF card
- Insert power
- Wait a moment (wait for the Raspberry Pi 4B GPU to complete system initialization, read config.txt, and load firmware)
- On the
Run and Debugpage:- First power-on:
- JLink: select
Rpi4b-AllCores-Openocd-Jlink-Launch - DapLink: select
Rpi4b-AllCores-Openocd-Daplink-Launch
- JLink: select
- Attach to a running system:
- JLink: select
Rpi4b-AllCores-Openocd-Jlink-Attach - DapLink: select
Rpi4b-AllCores-Openocd-Daplink-Attach
- JLink: select
- First power-on:
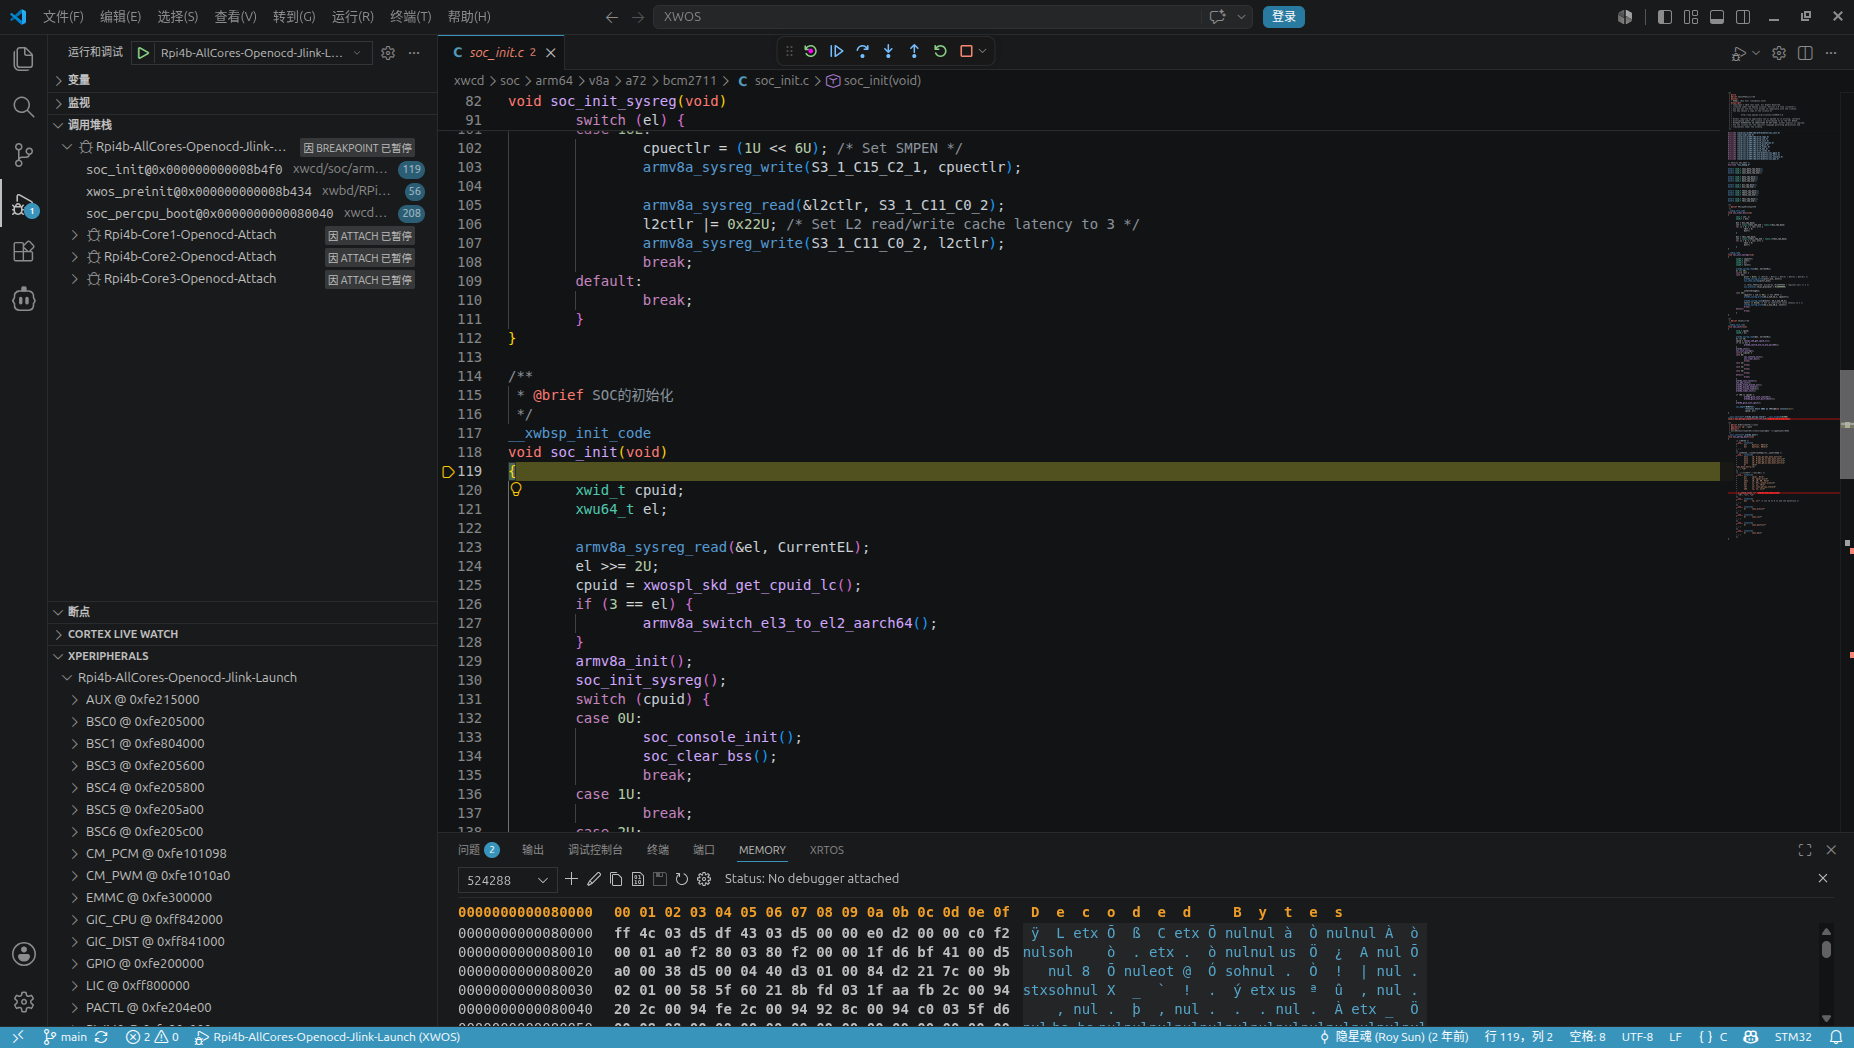
Debugging Tips
Boot Timing May Be Incorrect When Using Debugger
- After debug launch, CPU0 will stop at
soc_init(), and other CPUs will spin inSPIN_TABLE. - Continue running CPU0 to the
cpu0_mthd_mainfunc()thread’ssoc_boot_mp(), where CPU0 will start other CPUs. Only at this point can you click other CPUs’Continuebutton.
High Peripheral Address Mode
- The Vscode plugin
Cortex-Debugonly supports 32-bit addresses. Enabling high peripheral address mode will cause the peripheral register display function to fail.